Want My Button?

Blog Button

My Etsy Shop

On The Lookout For...

- Antique fans
- Vintage buttons
- Milk glass
- Antique Ball jars
- Vintage fabric
- Vintage coffee filters

Thanks For Featuring Me!

Search This Blog

Showing posts with label paper crafts. Show all posts

Wednesday

Uses for Cans - Valentine's Day

i know this is a little late, but i since i was at home sick on valentine's day, i just gave my co-workers their v-day treats this week.

this is what i gave them:
i filled the cans with dry red beans and i used bar-b-q skewers to hold the rice krispie treats.  i covered them in melted chocolate and sprinkled them with little hearts before they cooled.  and then i covered the cans with scrapbook paper.  i cut the paper to 4" x 10".
after i made these a co-worker reminded me of another use for cans.
it got me thinking about multiple uses for old cans... so i feel some more posts coming on new uses for old cans! :o)

hope you're all having a wonderful week!

Tuesday

a quick valentine gift- sour cream container

do you want to make a quick, simple, and economical valentine gift for someone special?  i think these little containers are great for valentine's day, but they would also be perfect for birthday parties, baby showers, and other special events!


here's something i threw together last week with supplies i had in the house... love that!

these little "sour cream containers" have been around in the paper craft world for awhile so i can't claim it as my own.  they are awesome little things though... i filled these containers with red, white, and pink m & m's... and it's really surprising how much these lil boogers hold.


here's how to do it...
-cut a piece of cardstock/thick scrapbook paper to 4 1/4" by 5 1/2" inches
 - put a strip of double-sided tape down one of the short ends of the paper
 - bring the short ends of the paper together to make a cylinder
 - off set the seam and pinch one of the ends closed
 - put a strip of double-sided tape on the inside edge and tape closed
 - place the taped edge in a paper crimper and roll about 3/4 of a turn
 - admire your crimped edge!
 - fill the container with goodies.  for this sample, i decided to use low calorie goodies.  wouldn't this be a perfect valentine gift for a crafty friend??
 - pinch the other side shut going the opposite direction. 
  - put a strip of double-sided tape on the inside edge and tape closed
 - crimp the edge.  it comes out perfect when you roll the crimper just enough to see the paper peeking out of the other side like in this picture.
 - admire your cute lil container! :o)
 - embellish by punching 2 lil holes
 - tie on a cute lil tag with some bakers twine and you're done!


it's the first week of the new term at work, i start a new class this week- digital video... FUN!!!, and my bike ride (hopefully 100 miles) is this weekend, so i'm pretty positive that this will be my only post this week.  


i'm planning a fun little treat for my co-workers on valentine's day so i'll post some pictures next week.


i hope you all have a wonderful valentine's day and that you feel incredibly loved!!

Thursday

Simple Cards

lately i've been on a paper craft kick.  when i'm blurfing (blog surfing) you'll find me on paper craft blogs. my faves have been all of the gals on the Papertrey design team.  the Papertrey mama bear is Nichole Heady.  now that would be a fun job... how do you get to be on a design team?  sign me up! :o)

when i make cards i like to keep them really simple.  i don't like taking out a ton o' supplies because that just means i'll have a ton o' things to put away.  also, i don't like a ton o' clutter all around me while i'm creating. 
i recently made this simple card...
 this is what i used to make it:
i totally grabbed the wrong stamp when i took the picture... did anyone notice that?  HILARIOUS! 
i made these cards for my co-workers because i wanted to write them a quick short thank you note.  i didn't need a lot of room so the cards are only 3" x 4".   since they're so tiny i made a matching envelope for them... CUTE!  i love tiny things! :o)

Friday

Cheap Gift Wrapping - Restyling a store bag

is anyone else like me?... do you have a crazy stack of bags that you picked up from department stores that you just can't seem to get rid of? 

the other day i was happy that i held on to those bags because i restyled it to use as gift wrapping for a birthday gift.

i wish i took a picture of the gift... it was for a sweet 11 year old who wants to go to FIDM when she grows up.  i bought this AWESOME book, Generation T:
i also picked up a cute tote and filled it with all the tools she would need to make the refashioned t-shirts in this book. 

if i were a kid, i would LOVE this gift.  funny, when i told my sis about the gift and how much i loved it, she said, "what?... you ARE a kid!"  LOL  she got me there!  :o)

ok... so those were the contents... now i had to find something to put it all in.  this bag was the PERFECT fit!
i loved the purple ribbon already on the bag so i went with the inspiration and created this: 
perhaps the tissue paper was a little out of control, but i didn't want to let anything show through.  ;o)  i love cutting the edge of tissue paper to make a scalloped edge... it's so pretty... like a cloud.

here's a close up of the bag.  i repeated the same thing on the other side.
the sweetest thing is that when i gave the gift to her, she held up the bag, twirled it around, and asked if i made everything. most kids tear into gifts.  she admired the wrapping before she opened it.  sweet, right?  what an observant little girl!

and she loved the gift!  of course we couldn't wait and we make one of the refashioned t-shirts right away.  she made a shirt like this... this isn't a picture of her, i found it on the internet... unfortunately i was too excited about the gift and i forgot to take pictures... shame on me!


 i love that i have a smart head on my shoulders. :o)

Wednesday

Paper Flowers

i've been enjoying my paper crafts lately... and i made these flowers this week. 
i started out with a 1 x 8 1/2 inch piece of paper. 
trimmed the edge with my scallop punch. 
scored the paper strip at each indentation in between the scallops. 
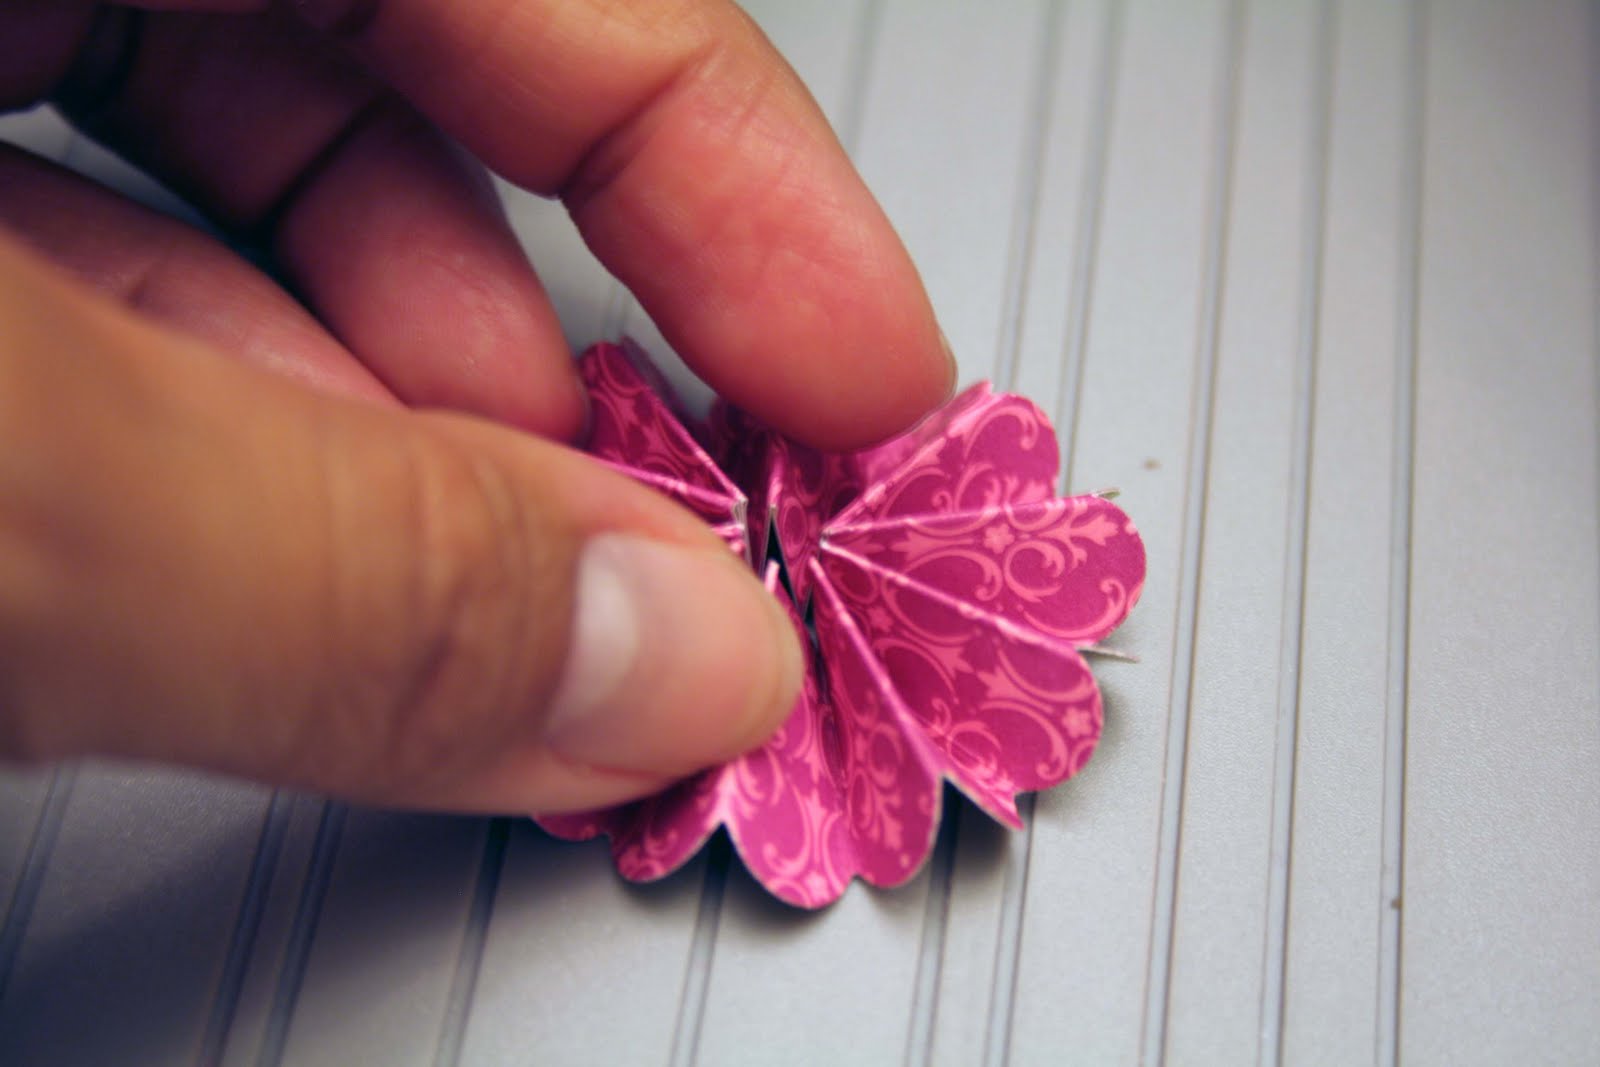
then folded the long strip of paper accordion style.
when i got to the end, i had to use a really strong adhesive to join the ends.
just press the two ends together. 
this part is a little awkward.  push the top part down and kinda flatten it without flattening it.  does that make sense?  i kinda had to wrestle with it.
cut out two little circles, use really good adhesive and glue them down in the center on both sides of your flower. 
here's the other side. 
i LOVE double-sided paper!  

these are going up in my craft room, but i'm showing that a little later.  :o)

Saturday

DIY Business Cards

i've wanted to take pictures of local vendors at the farmers market for my blog, but i haven't because i've gone through this conversation in my mind... 

me: "hi, do you mind if i take pictures of your items/table/store for my blog?"
them: "sure, what blog?"
me: muttering on about my long blog address...

so it's been easier not to take any pictures.

i've thought about it more because i've seen several awesome vendors and i would love to share pictures of them and what they do.

i came up with this simple card to give them IF they ask "what blog?".
 (funny/sad story. while taking pictures, i ran over this card with my chair.  i'm in the process of making another one.)

i found some easy-to-find scrap pieces of card stock (yay for organized pieces of scrap paper!) and stamped white polka dots with white craft/pigment ink.  then i stamped my blog address with this customizable stamp i found at the office supply store (i totally forgot i had it and recently found it while organizing my garage). 
i love it because it comes with 2 sizes of letters that include http://, www, fax, email, and so on...
i just sewed a zig zag on to the paper, 
punched a cute flower, 
rounded out the corners, 
punched some holes with my cropodile, 
and i was finished!

i made some other variations too.
i like the different sizes and colors.  i know it's something that will keep evolving... i want to try it with different color cardstock and thread, different wording and backgrounds.  it's kinda fun.  my camera case has a little pocket inside and i've already tucked a few of these inside.  now i'm looking forward to taking pictures of some local vendors!  :o)

Thursday

Organizing My Rubber Stamps

whenever i get stamps out for a project, it always seems like i'm reacquainting myself with my stamps.  i always forget which sets i own.  i store my stamps on their sides in large rubbermaid drawers, so it's difficult to take one look and see its contents.

i've been wanting to take inventory of my stamps for quite awhile now, but knew that it would take a couple of days to complete.  so here it is! the big reveal!  LOL  seriously though, i'm really loving it.  i created this binder as a quick reference to what stamps i have and which drawer they're located in.
i used my rub on letters to write on the cover... have a mentioned lately how much i LOVE rub on letter?? ;o)
when i open it up, it's broken down into the categories and drawers the stamps are located in:
  • tags & greetings
  • nature & elements
  • holidays & occasions
  • backgrounds, borders, & shapes
here's the 1st page of my tags & greeting stamps. i stamped all the images on a blank piece of paper,  and circled and labeled each set so i can quickly find the stamp set.
here's the 1st page of the nature & elements stamps.
here's the first page of the holiday & occasions stamps.
here's the first page of the backgrounds, borders, & shapes stamps.
behind all of these pages are my clear stamps. i love how they store flat and all in one place!  clear stamps are so fun to work with... you know EXACTLY where they're going (which is nice for a perfectionist like me).  :o)
most of the clear stamp sets have an additional piece of plastic that shows the image.  for those that don't, i saved the sheet that came with them or i stamped the images and stored them in the page in front of the set.
these next 2 sets are from PAPERTREYink.  i love their stamps and they have some TALENTED designers and bloggers who inspire me.  i love how these sets fit perfectly into this divided sleeve. my sis gave me a couple different sets of divided sleeves and they were perfect for this project and for storing recipes in a cookbook binder... i'm not sure where she picked them up.
and in the back are all of my clear alphabet sets. 
hope i didn't bore you with all of the pictures. i really love my stamps organized this way.  now when i need a butterfly stamp i can flip through all of the pages of nature & elements and look at my options.  it's so much easier, quicker, and neater than going to the drawer, flipping through all of the boxes of stamps, pulling them out, and comparing all my options.  also, now when i'm tempted to buy new sets, i browse through this to see if i really need a new set.  by the time i've flipped through the binder, i know i don't really need another set. :o)
 
Blog Design by Delicious Design Studio