Here's the before:

I can't believe I actually remembered to take a before. I'm finding that I'm so excited about working on pieces that I forget to take the befores. Which is a bummer because then the afters aren't so fun. :( So I dedcided to take pictures AS SOON AS I GET HOME. (I'm emphasizing this as a reminder to myself). ;)
I primed it and then painted it with a combination of browns from Rusteloleum and Valspar. I have to also say (as a reminder to myself) that I really prefer Rusteloleum 2 coat spraypaint over Valspar. I like the consistency and the spray. Rusteloleum seems to spray everywhere. It leaves me in a huge cloud of paint with a huge headache. And that's with wearing a mask.
So after I finished priming, painting, and sealing with Minwax Fast-Drying Poly in a spray can-- which can I say.... I LOVE!!!! I've had the hardest time with Wipe-on Poly. I know others in blogland rant and rave about it, but I think I must be a lame-o because I can't get it to spread evenly and I get little pieces of lint stuck in my projects and that drives me crazy! So until I perfect that process I'm sticking with my new love-- spray can poly! Actually the guy who helped me at Home Depot said that contractors come in and buy boxes and boxes of this stuff. So they must *heart* spray on poly too. :)

Ok... I'm done with my spray on poly rant. For now. Oh wait, maybe not. Just so you know the spray can has this awesome little feature- you can adjust a little red thingie on the spray nozzle that will allow you to spray side to side or up and down. I finished a dining room table, 1 chair, and this cupboard with one can.
Ok, now I'm really done. I just received a call back from some items I want from Craigslist so I have to git so I can pick them up. :)
Here's where the "girl power" part comes in. After I completed this project I couldn't wait for help to hang it. So if you're like me either living alone or impatient to wait for a boyfriend or husband to help, here's how I hung this heavy piece.
Here are the supplies I used:

I cut the back open so my piece would fill the whole thing. I lined it up with the top of the bag, traced the sides of the bag, poked holes with a pencil where the holes were in the back of the cupboard (as indicated by the arrows), then I taped it up on the wall to allow me to make sure I liked the placement and to make sure it was level.


I even used the template to make sure it was centered. My family would have a heart attack if they knew I measured. I'm more of an eye-er, I hate taking the time to measure, but by using the bag it was easy and I figured why not??

Then I made marks with a pencil, drilled holes for the anchors, nailed the anchors in, lifted my cupboard up, and... the holes matched!!! Woooohoooo!


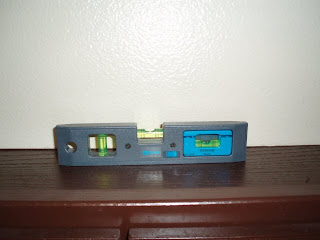
I checked again to make sure it was level.

Awwwww yeah baby!!!
Here's the finished product with the before and after:


I glued StampinUp decorative scrapbooking in the back of the cupboard. I loved how it turned out!

Now I have to rummage around my house to find things to decorate it with.
Ahhhhhh... a finished piece. That feels good.


2 comments:
Great minds think a like. It looks great, I like the paper! Jen
I love your imagination and talents you have discovered. You never fail to amaze me.
Pops
Post a Comment