Like I said before, I'm really don't consider myself a sewer. I have a couple of unfinished projects lying around the house because they just didn't turn out right, or because I was overwhelmed and just couldn't complete them. I find myself comparing my skills to other people like my mom who is a quilter or my friends who sew incredible clothes and then I give up before even trying.
But then I think back on something my dad said to me years ago when I made the switch from Macs to PCs. He said, "Don't be afraid to play around on it, you won't break it". I've taken those words and added a few of my own, "Don't be afraid to play around. Have fun, you won't break it". That's the approach I take with all of my DIY projects. When sewing this bag last night and this morning, it finally dawned on me that sewing is like all other areas of our lives: we all have our unique styles and approaches to things. I don't do well with patterns and a lot of written instructions. I need pictures to see the process of creating something. This project was perfect for me.
So here's my process of making my new book bag.
What you'll need:
5/8 yard of fabric for the outside of the bag
1/2 yard of fabric for the top border and handles of the bag
1/2 yard of fabric for the lining of your bag
thread
webbing (optional)
Follow Ruffles and Stuff's instructions to make the bag.
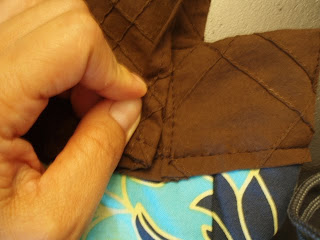
This is a part that almost hung me up.
The next time I make a purse I will cut the top border of the purse at 6 x 30.
I finished off the fabric and pressed it. Then I started pinning it to the rest of the bag.
I came up a little short so I used another small piece of fabric to fill my gap.
Here it is with the pinning complete.
I'm really rough on things , so I decided to add webbing to the handles of my bag.
I sewed my strip together length wise, right sides facing each other.
Then I flipped it inside out.
Slid the webbing in.
Tucked the ends in and stitched it closed going over the sides and ends of the handle.
I positioned the handles 2 inches in.
And guess what?? It covered up my boo boo where I came up short in fabric.
Yaaay! I love it when things work out like that.
Now that the bag was finished, I wanted to make a flower to pin on the side of the bag.
I cut a 4 x 27 piece of fabric.
Sewed the side.
Turned it inside out. Pressed it then tucked in the ends and sewed it shut.
Now I created a ruffle by sewing down one side of the fabric on the longest stitch at the highest tension.
I got out my needle and thread and put long stitches on the bottom part of the flower.

Pull on the thread to make it bunch up, creating the flower. Go back and tack it where needed to create the look you want. Tie it off when you're done.
Here is my flower complete.
A side view showing the pleats.
My completed project!
With books in it. Now I'm ready for class!
**Enter my drawing HERE**
Check out other's creative projects HERE.


6 comments:
Oh I love your bag!! I love the wider top (perfect for books!) and the webbing idea. I didn't even know about webbing!!
This was so fun to see someone make something from one of my tutorials! I love it, love it, love it!
LOVE LOVE LOVE this!!! LOVE the fabric and the design!!
I love your fabric. Cute idea with the flower.
Wow! That is so cute. I love it and I really think the flower is a great added touch.
Wonderful job!
Alyssa
lifeoflyssie.com
OMG!!!! What an adorable bag. My sewing skills are so not to that place yet. I am terrible at measuring/cutting. You need an Etsy store to sell these in. :) Visiting from Kimba's party. :)
You did a great job! I love it!
Post a Comment